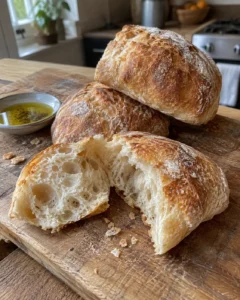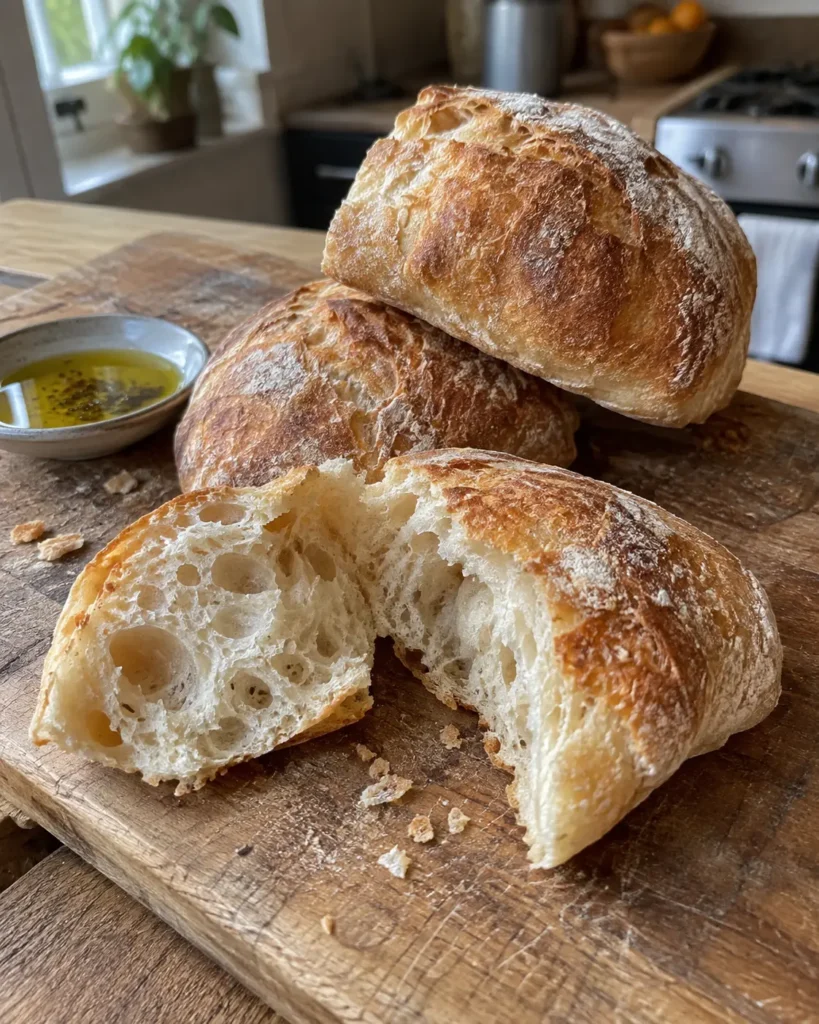
There is something deeply satisfying about tearing into a warm, crusty ciabatta bread roll. The outside crackles lightly beneath your fingers, while the inside stays soft, chewy, and full of those beautiful irregular air pockets that make ciabatta so special. These rolls are rustic in the best way: imperfectly shaped, generously flour-dusted, and made for everything from a simple bowl of soup to an overstuffed Italian-style sandwich.
This homemade Crusty Ciabatta Bread Rolls is for anyone who loves bakery-style bread but wants a method that feels approachable in a home kitchen. The dough is wetter and softer than a standard dinner-roll dough, so it may look a little unusual at first. That moisture is exactly what creates the light, open crumb and crisp shell that define great ciabatta.
Serve these crusty rolls warm with olive oil, split them for sandwiches, or use them to scoop up sauces and soups. They are especially delicious beside a comforting bowl of Tuscan soup, where sturdy bread can soak up the flavorful tomato broth without immediately falling apart.
Why You’ll Love These Crusty Ciabatta Bread Rolls
- They have a crisp, golden crust and a soft, airy center.
- Their rustic shape means no complicated rolling or perfectly even shaping.
- They are versatile enough for sandwiches, soups, salads, and dinner.
- The dough develops real bakery-style flavor as it rests.
- They are made with familiar pantry ingredients.
Ciabatta is an Italian bread known for its broad shape, open interior, and chewy texture. Unlike soft, buttery dinner rolls, ciabatta rolls rely on a wetter dough, gentle handling, and high baking heat. The goal is not a perfectly smooth roll. Instead, you want a lightly puffed roll with plenty of character, a crackly crust, and a tender interior.
Table of Contents
What Makes Ciabatta Different From Other Bread Rolls?
The biggest difference is hydration. Ciabatta dough contains more water than many traditional bread doughs, which gives it a loose, sticky feel. That extra moisture creates steam during baking and helps form the large, uneven holes inside the bread.
The dough is also handled more gently than a typical sandwich-bread dough. Instead of aggressively kneading and pressing out the air, you build strength through folds and give the dough plenty of time to rise. This preserves the bubbles that eventually become the roll’s signature open crumb.
Quality flour matters here, too. Wheat flour has the protein structure needed to support a yeast dough as it expands. King Arthur Baking’s yeast-baking guide explains that wheat flour provides the protein necessary for the structure of yeast breads, while careful flour measurement helps prevent dry, dense dough.
Ingredients You’ll Need – Crusty Ciabatta Bread Rolls
Ciabatta is wonderfully simple. The ingredient list is short, but each ingredient has an important job.
Flour
Bread flour is a great choice for ciabatta because its higher protein level helps the dough build strength while staying elastic. All-purpose flour can work, but bread flour generally gives the rolls a chewier bite and better structure.
Water
Water is what gives ciabatta its light, airy texture. The dough should feel soft and sticky rather than dry or firm. Resist the urge to keep adding flour while mixing; too much flour can make the rolls dense.
Yeast
Yeast gives the dough lift and contributes to its flavor as it ferments. Make sure your yeast is fresh and stored properly. Lukewarm water helps yeast dough get started, while a slower rise can build deeper bread flavor.
Salt
Salt does much more than make the rolls taste good. It balances the flavor and helps control yeast activity, which supports a more even rise.
Olive Oil
A little olive oil adds flavor and keeps the crumb pleasantly tender. It also gives the dough a subtle richness without making the rolls heavy.
How to Make this Crusty Ciabatta Bread Rolls
Mix the Dough
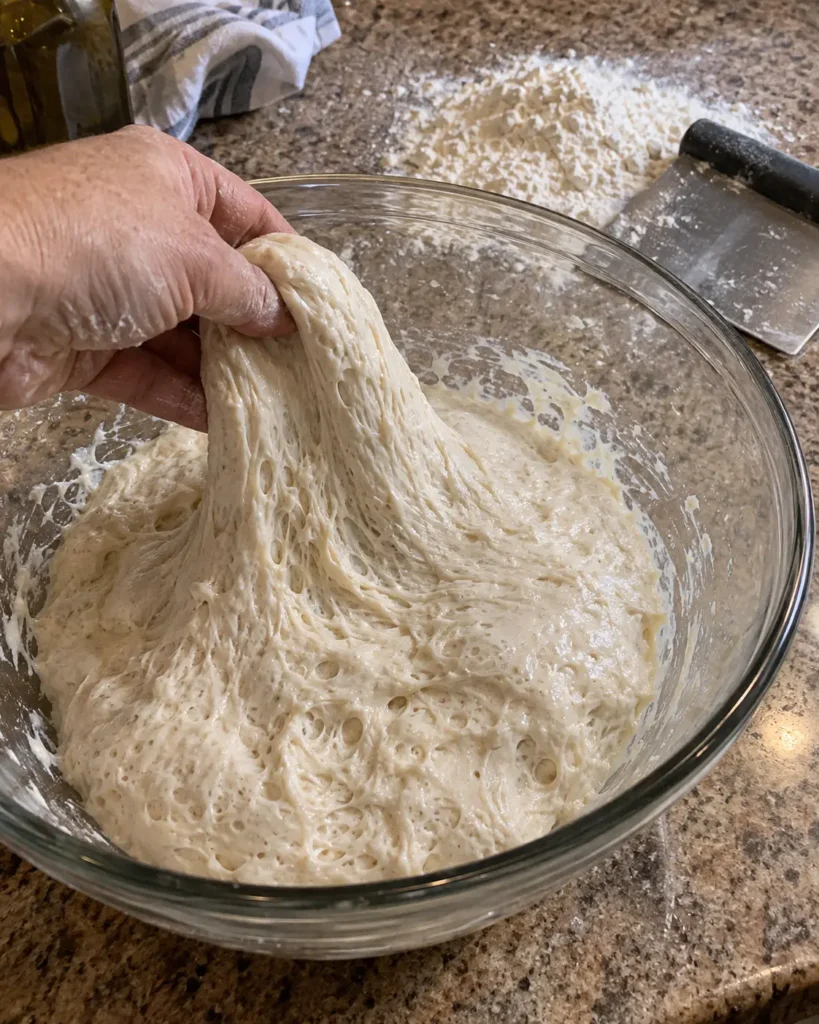
Start by combining the water, yeast, flour, salt, and olive oil according to this Crusty Ciabatta Bread Rolls card. The dough will look shaggy and sticky. That is completely normal. Ciabatta dough should not look like a smooth, firm ball of dough.
Mix until there are no dry pockets of flour, then let the dough rest. This resting time gives the flour a chance to absorb water and begins developing gluten without much work.
Build Strength With Folds
Rather than kneading ciabatta dough on a heavily floured surface, use a series of gentle stretch-and-fold motions. Lift one edge of the dough, stretch it upward, and fold it back over itself. Rotate the bowl and repeat.
These folds help the dough become stronger while protecting the air bubbles. As it rests between folds, you will notice that the dough becomes smoother, puffier, and easier to handle. You do not need to make it perfectly tight; a relaxed dough is part of ciabatta’s charm.
Let the Dough Rise
Cover the bowl and let the dough rise until it looks noticeably expanded and bubbly. The exact timing depends on the temperature of your kitchen, so watch the dough rather than only watching the clock.
A properly risen ciabatta dough should look alive with bubbles around the surface and edges. If it has barely changed, give it more time. If it looks extremely fragile, collapsed, or sharply sour-smelling, it may have risen too long.
Shape Gently
Turn the dough onto a generously floured surface. Do not punch it down. Instead, carefully ease it into a rough rectangle, dust the top with flour, and divide it into individual rolls.
Use a bench scraper or sharp knife for clean cuts. Transfer the pieces gently to a parchment-lined baking sheet, leaving room between them. Their uneven, rustic shape is exactly what you want.
Bake Until Deeply Golden
Ciabatta benefits from high heat. A hot oven creates a burst of oven spring before the crust sets, helping the rolls become tall, airy, and crisp.
For a crustier finish, steam is helpful during the first part of baking. You can place a metal pan in the oven and add hot water just before baking, if your recipe instructions allow. Steam delays crust formation briefly, allowing the rolls to expand before the exterior becomes crisp. According to King Arthur Baking’s bread guide, crusty rolls benefit from higher heat and steam in the oven.
Bake until the rolls are richly golden brown—not pale. A deeper color means more flavor and a better crust.
Tips for the Best Crusty Ciabatta Bread Rolls
Do Not Add Too Much Flour
Sticky dough can feel intimidating, but flouring it heavily changes the texture. Use flour on your hands and work surface only as needed to prevent sticking. The dough should remain soft.
Use a Scale When Possible
Bread baking is more reliable when ingredients are measured by weight. A small amount of extra flour can noticeably change a high-hydration dough like ciabatta.
Give the Dough Time
Ciabatta is not difficult, but it cannot be rushed. Resting and rising allow flavor and structure to develop. A slower dough is usually easier to shape and produces a better interior texture.
Handle the Dough Lightly
The air bubbles are precious. Avoid pressing, rolling, or aggressively reshaping the dough once it has risen. Gentle handling helps preserve the open crumb.
Preheat the Oven Thoroughly
A truly hot oven helps the rolls rise quickly and creates that crisp, blistered crust. Give your oven enough time to heat fully before the rolls go in.
For another helpful overview of traditional ciabatta technique and the importance of a wet, bubbly dough, see this homemade ciabatta guide from Sally’s Baking.
Ways to Serve Crusty Ciabatta Bread Rolls
These rolls are at their best on the day they are baked, especially while still slightly warm. Their crisp crust and chewy center make them a natural fit for so many meals.
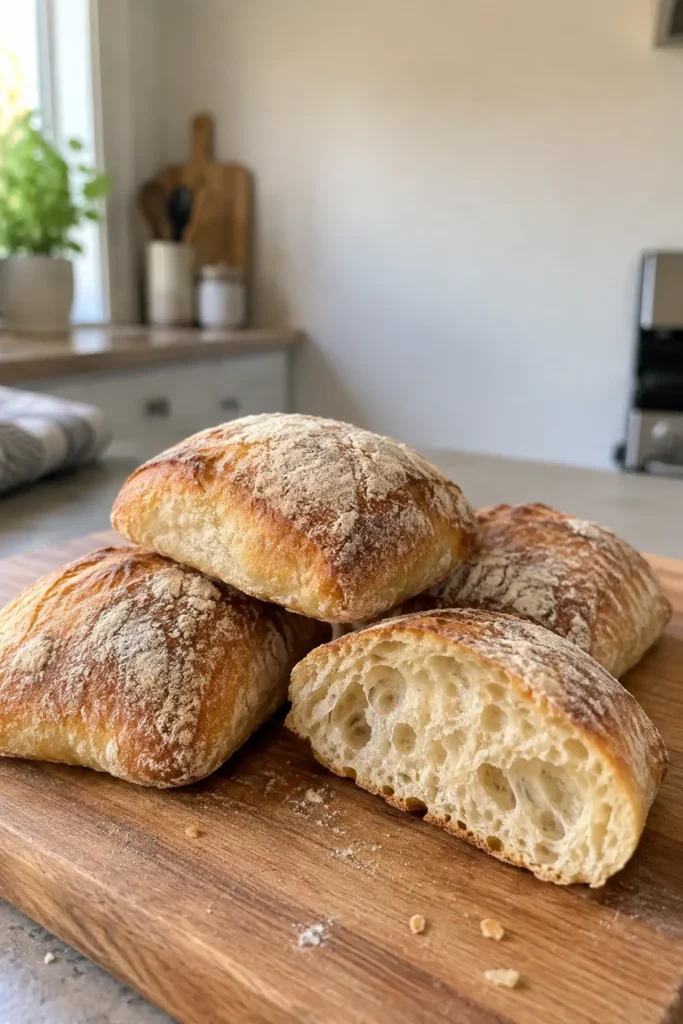
Use them for:
- Turkey, mozzarella, roasted vegetable, or Italian deli sandwiches
- Garlic bread with butter, olive oil, or herb spread
- A side for pasta, stew, or chili
- A simple lunch with olive oil and balsamic vinegar
- Breakfast sandwiches with eggs, cheese, and greens
- Toasted crostini-style appetizers
Try serving them with a saucy dinner such as Pollo Guisado Puerto Rican. The crisp exterior holds up beautifully while the soft interior is perfect for soaking up the rich sauce. They also make a delicious side for Sheet Pan Gnocchi Broccoli, adding a fresh-baked touch to an easy Italian-inspired dinner.
Storage and Freezing Tips – Crusty Ciabatta Bread Rolls
Fresh ciabatta is best enjoyed within a day or two. Store completely cooled rolls in a paper bag or loosely wrapped at room temperature. Avoid sealing them in an airtight plastic container if you want to preserve the crust, as trapped moisture can soften it.
To refresh day-old rolls, warm them in a 350°F oven for about 5 to 8 minutes. The heat helps revive the crust and softens the interior.
For longer storage, freeze the cooled rolls in a freezer-safe bag. When ready to serve, thaw at room temperature or warm straight from frozen in the oven until heated through. Freezing is a great option if you want to bake a batch for future sandwiches or quick dinner sides.
Frequently Asked Questions – Crusty Ciabatta Bread Rolls
Why is ciabatta dough so sticky?
Ciabatta dough is sticky because it has more water than many standard bread doughs. That moisture is essential for the open, airy interior. Use lightly floured hands and a bench scraper instead of adding large amounts of flour.
Can I make ciabatta rolls with all-purpose flour?
Yes, all-purpose flour can work. Bread flour is often preferred because it provides extra strength and chew, but all-purpose flour can still make delicious homemade rolls.
Why are my ciabatta rolls dense?
Dense rolls usually come from adding too much flour, under-proofing the dough, or pressing out too much air during shaping. Keep the dough soft, allow enough rising time, and handle it gently.
Do I need a stand mixer?
No. A stand mixer is convenient, but you can make ciabatta by hand. Stretch-and-fold motions are especially useful for wet dough and do not require special equipment.
Can I make the dough ahead of time?
Yes. A longer, cooler rise can deepen the flavor. Follow your recipe’s instructions for refrigeration and allow the dough enough time to come back to a workable temperature before shaping.
Final Thoughts – Crusty Ciabatta Bread Rolls
Crusty ciabatta bread rolls are proof that simple ingredients can create something truly memorable. With a little patience, gentle folding, and a hot oven, you can make rolls with a crisp golden crust, a chewy center, and the rustic open crumb that makes ciabatta so irresistible.
Serve them alongside soup, fill them with your favorite sandwich ingredients, or enjoy one warm with olive oil. Once you taste a freshly baked homemade ciabatta roll, it will be hard to settle for the store-bought version again.
Print
Crusty Ciabatta Bread Rolls
- Prep Time: 30 minutes
- Cook Time: 22 minutes
- Total Time: 172 minutes
- Yield: 8 rolls 1x
- Category: Bread
- Method: Baking
- Cuisine: Italian-Inspired
- Diet: Vegetarian
Description
These crusty ciabatta bread rolls have a crisp golden exterior and a soft, chewy, airy center. They are perfect for sandwiches, serving with soup, or enjoying warm with olive oil.
Ingredients
4 cups bread flour (480g)
1 3/4 cups lukewarm water (420ml)
2 teaspoons instant yeast
1 1/2 teaspoons fine salt
1 tablespoon olive oil
All-purpose flour, for dusting
Instructions
1. In a large bowl, combine the bread flour, instant yeast, and salt.
2. Add the lukewarm water and olive oil. Stir until no dry flour remains and a sticky, shaggy dough forms.
3. Cover the bowl and let the dough rest for 20 minutes.
4. With wet hands, stretch one side of the dough upward and fold it over itself. Rotate the bowl and repeat three more times. Cover and rest for 30 minutes.
5. Repeat the stretch-and-fold process once more, then cover the dough and let it rise until puffy and bubbly, about 60 to 90 minutes.
6. Generously flour a work surface and gently turn out the dough. Dust the top with flour and carefully shape it into a rough rectangle without pressing out the air bubbles.
7. Divide the dough into 8 rustic rolls. Transfer them to a parchment-lined baking sheet, cover loosely, and let rise for 30 minutes while the oven preheats to 425°F.
8. Bake for 20 to 22 minutes, until the rolls are deep golden brown and crusty. Cool on a wire rack for at least 15 minutes before serving.
Notes
Ciabatta dough should be soft and sticky; avoid adding too much flour, which can make the rolls dense.
Handle the dough gently after rising to preserve the airy interior.
For the best crust, serve the rolls on the day they are baked.
Store cooled rolls at room temperature for up to 2 days, or freeze for up to 2 months.
Nutrition
- Serving Size: 1 roll
- Calories: 235 kcal
- Sugar: 0g
- Sodium: 430mg
- Fat: 2g
- Saturated Fat: 0g
- Unsaturated Fat: 2g
- Trans Fat: 0g
- Carbohydrates: 47g
- Fiber: 2g
- Protein: 7g
- Cholesterol: 0mg